

.png)
Zapier
Integration
Businesses use multiple applications to streamline workflows. Integrating Corefactors CRM with Zapier unlocks automation, ensuring seamless data synchronization across platforms.
.png)
.png)
Deliver connect customer conversations at unprecedented scale, speed, and ubiquity
About
Zapier is a no-code automation tool connecting thousands of applications. It facilitates data transfer and workflow automation between software solutions, enabling smooth communication between Corefactors CRM and tools like email marketing, e-commerce, and productivity apps.
Why Integrate Zapier with Corefactors?
Corefactors, an AI-driven RevOps CRM platform, enhances customer interactions, sales, marketing, customer support and customer success operations. Corefactors CRM offers ready-to-use APIs, but some third-party apps may have limited API access. In such cases, Zapier acts as a bridge, enabling seamless data exchange without custom development.
.svg)
Automating Workflows
Zapier automates tasks like lead capturing and follow-ups, reducing manual work and errors. It enables trigger-based actions, making workflows smoother and more efficient.

Enhancing Lead Management & Data Sync
Leads from multiple sources flow seamlessly into Corefactors CRM. Real-time data sync ensures accuracy, giving teams a unified customer view.

Improving User Experience
A connected experience allows real-time data flow between business tools, ensuring faster responses and better customer engagement.
.png)
AI Insights and Advanced Analytics
Corefactors provides AI-driven call insights, sentiment analysis, and agent performance analytics. Businesses can gain deep customer insights, optimize decision-making with data-driven strategies.
.png)
Transform Your Business with

.png)
.png)
Get Started with Corefactors CRM + Zapier Today!
Interested in automating your business workflows? Contact us today!
User guide on “how to send Google Sheet data to Corefactors using Zapier Integration”
Note: This user guide explains about the configuration steps that need to be taken if a business wants to send their Google Sheet data to Corefactors Lead Box through Zapier Integration.
To start with, there are mainly two parts in Zapier Workflow configuration; Trigger and Action.
Go to your Zapier account.
Under Zaps menu, click on the “Create Zap” to create a new workflow for your business needs.
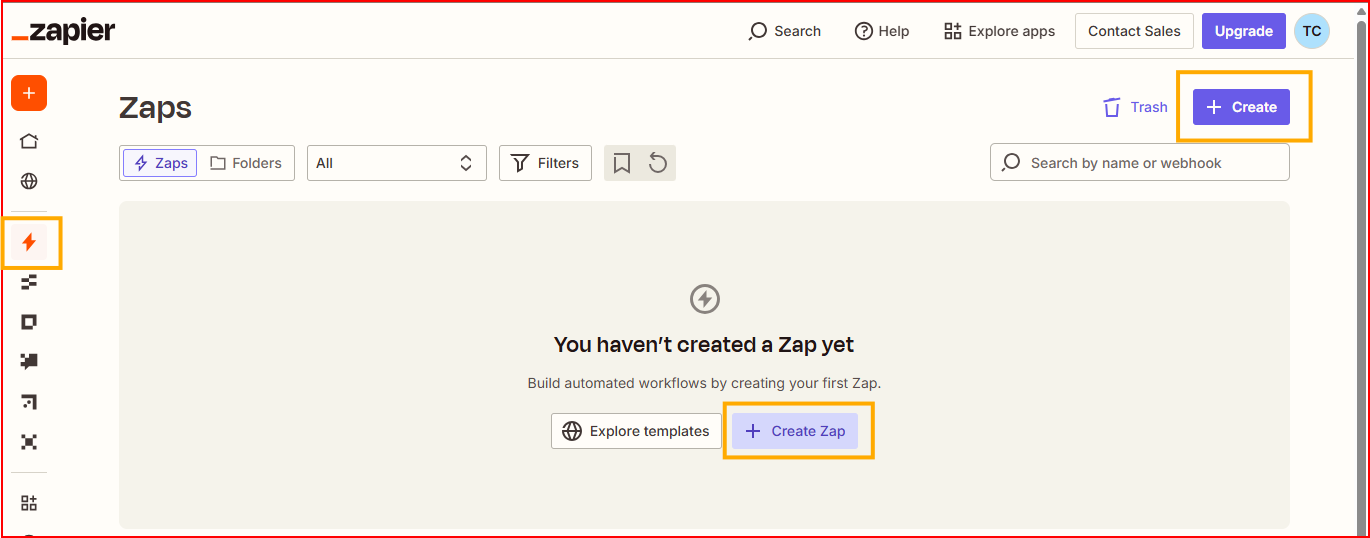
Create Workflow by giving proper name.
E.g. Google Sheet > Zapier > Corefactors Lead Box
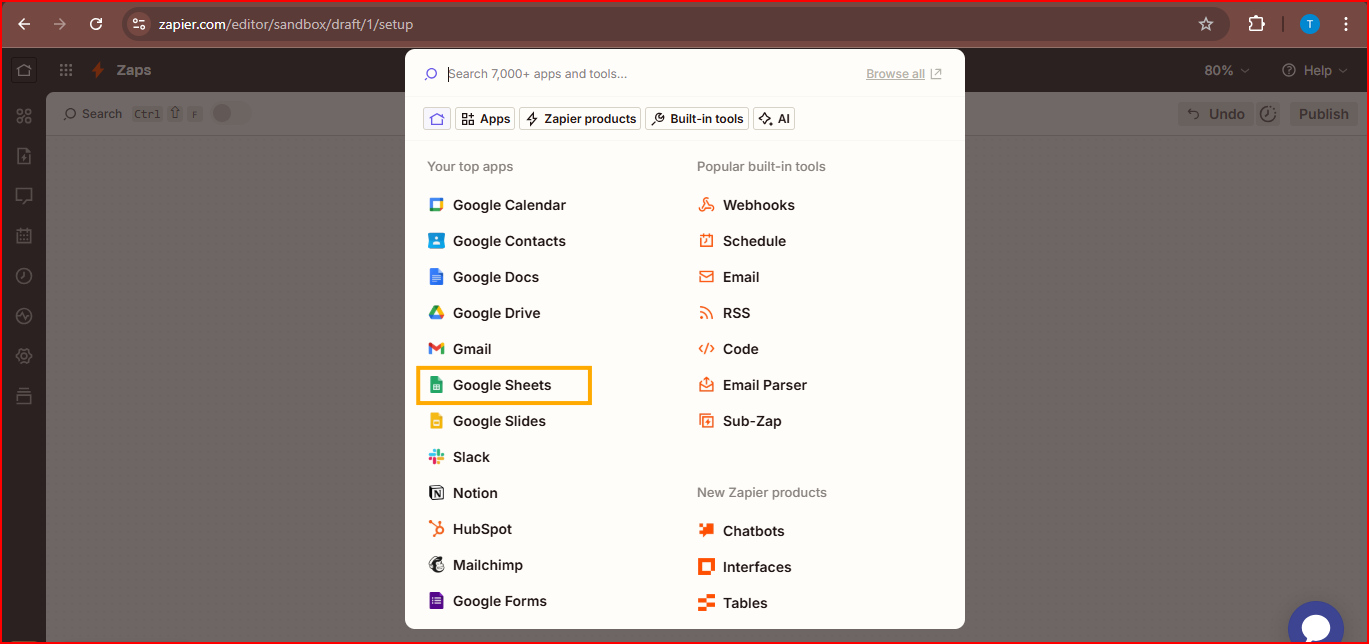
Now in the Trigger part, search and select Google Sheet.

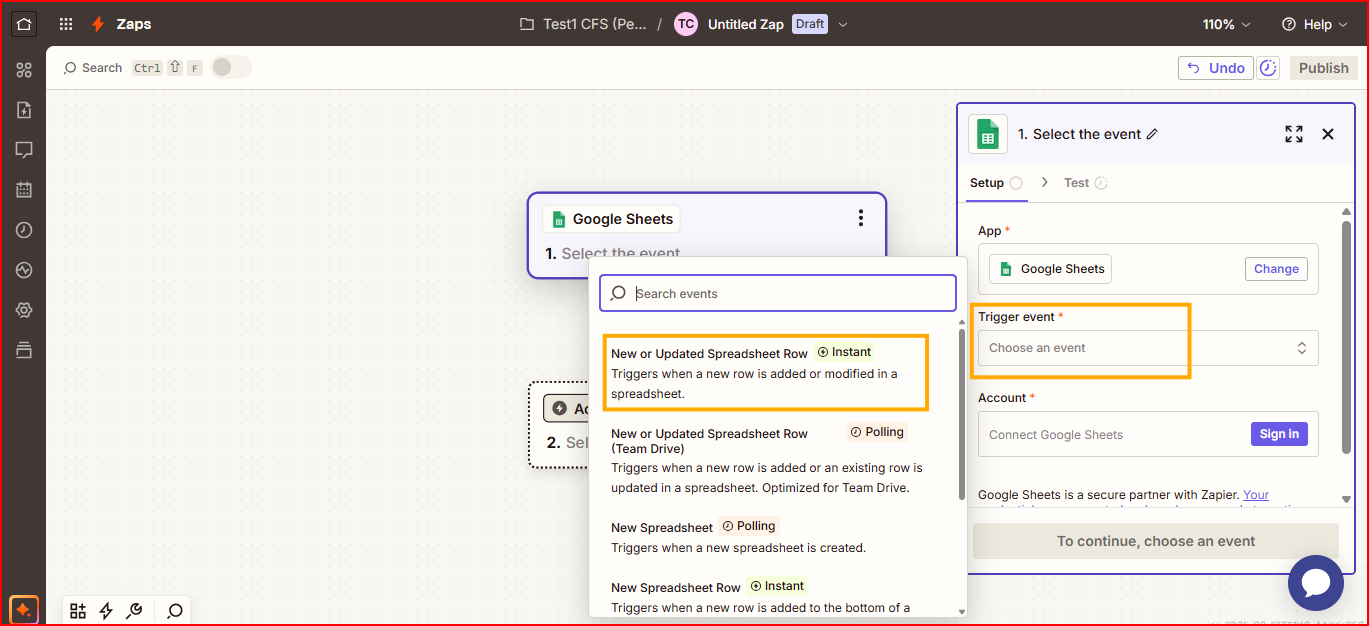
Select “New or Updated Spreadsheet Row”. You can select others as well based on your business needs.


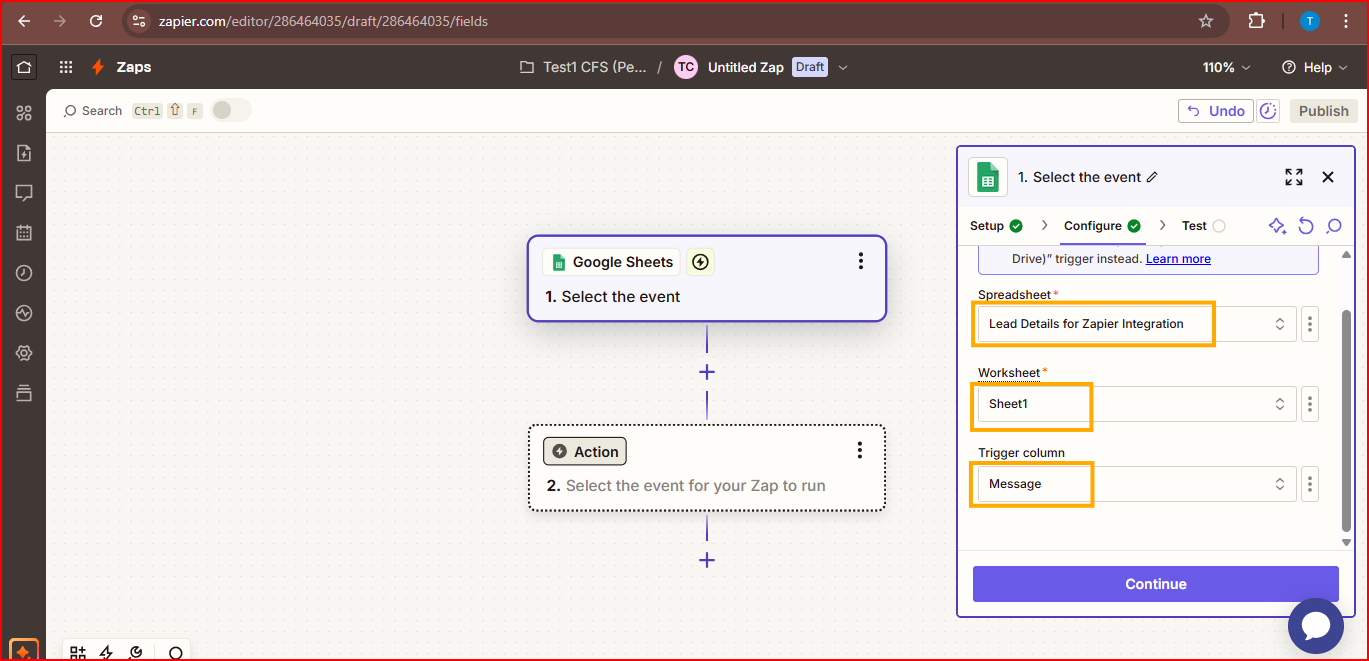
Click “Continue” and select the Google Sheet file name from where you want to pass lead data to Zapier and then to Corefactors Lead Box.

For example, below is the Google Sheet we are going to use for this testing/demo purpose.

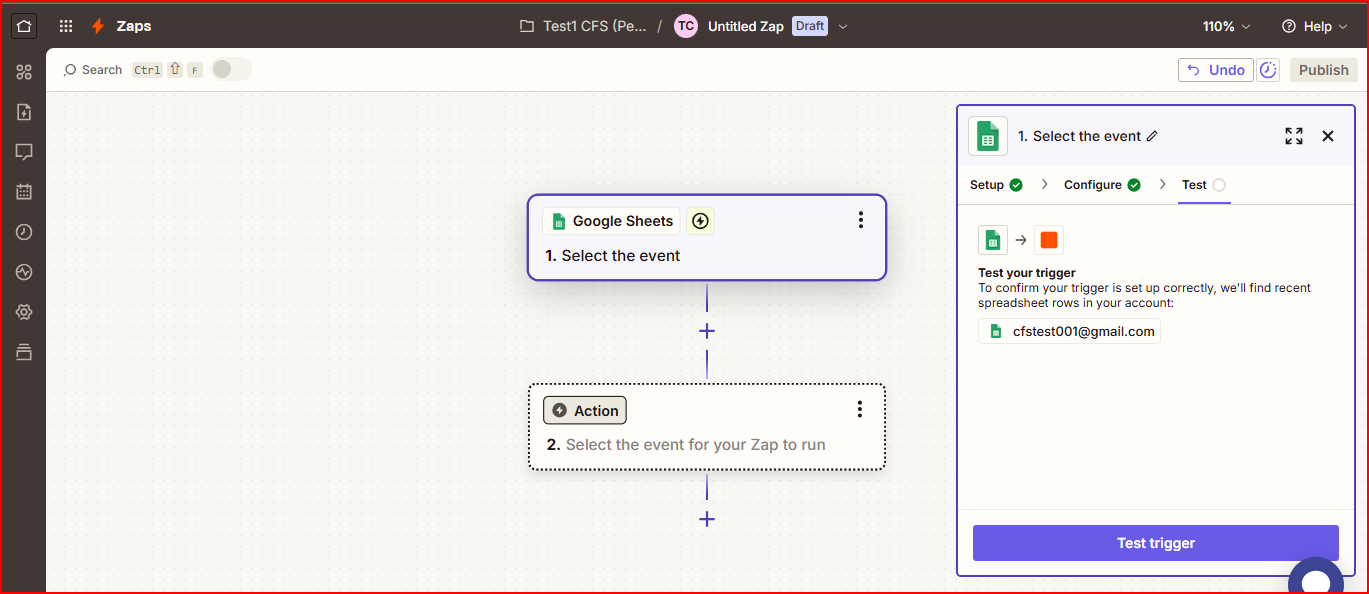
Google Sheets with data so that Zapier can fetch these row data during “testing” and can show you whether the Zaps 1st part (i.e. Trigger part) is working or not.
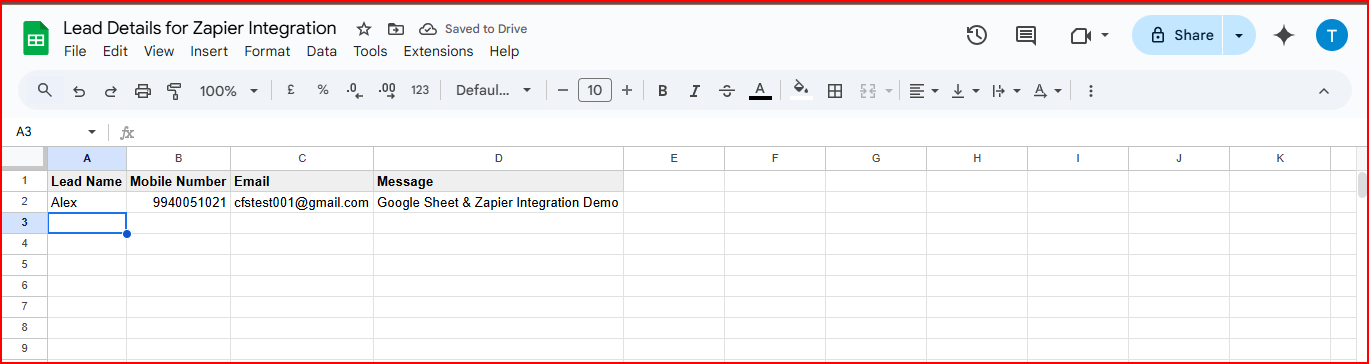
As you can see, it has perfectly captured the Google Sheet data.

The 1st part of the solution (i.e. Trigger) “Getting Google Sheet data in Zapier” is completed here.
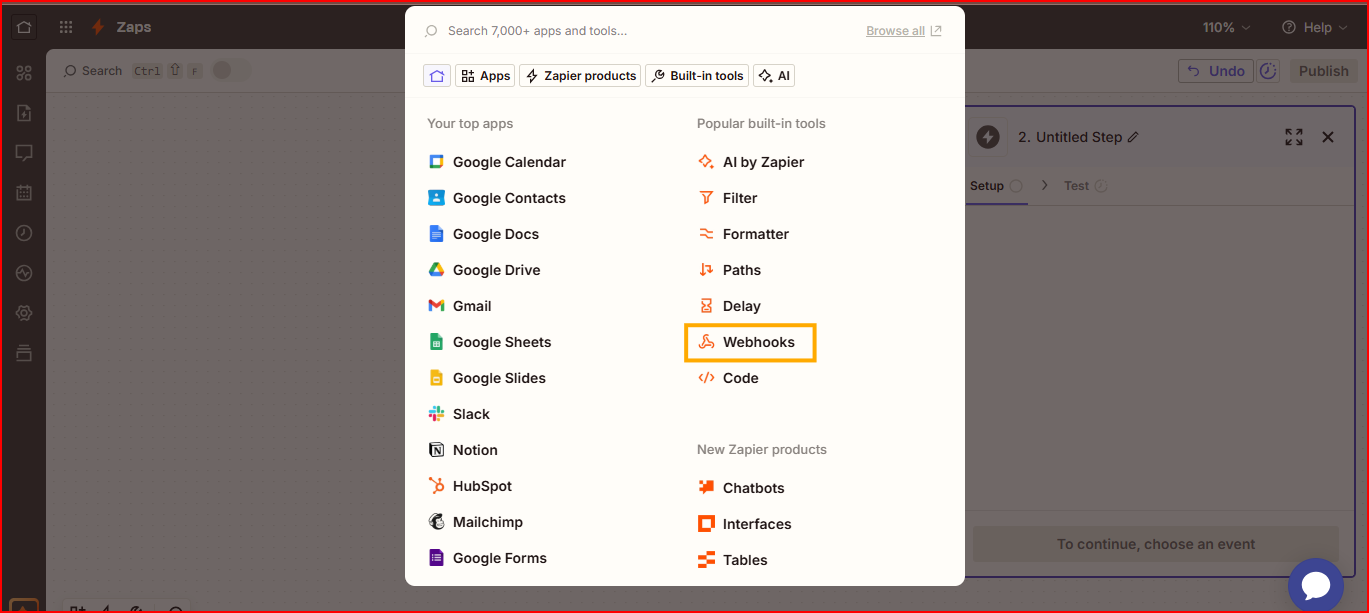
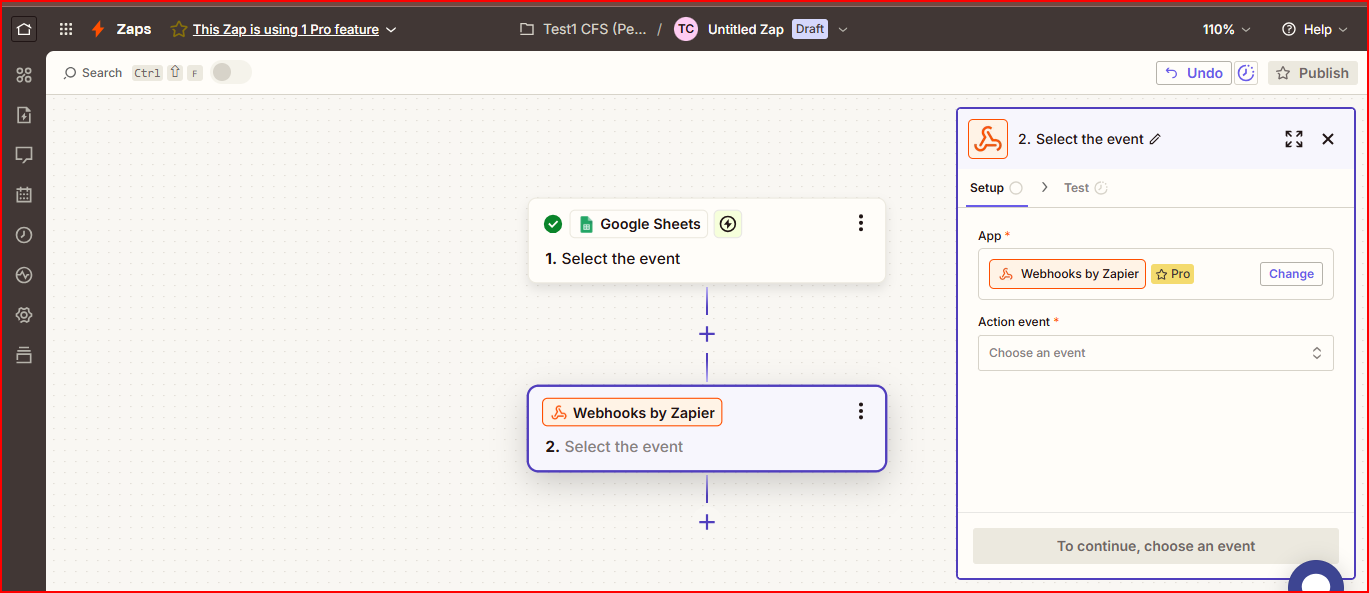
Now we will move to next part of the Zap creation process i.e. “Action” part.
Since, Zapier needs to send these lead data to Corefactors lead api end point url, hence select the “Webhooks” option from the given list.
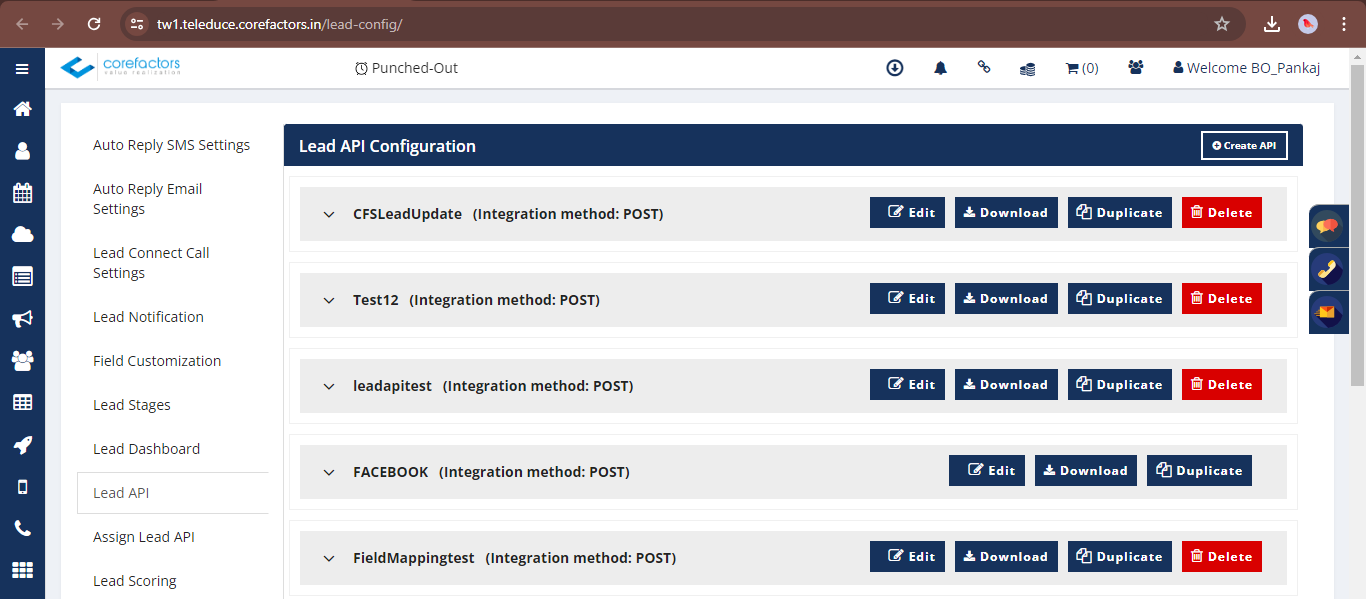
Corefactors Lead API creation
If you have the Corefactors lead api ready with you then it is good, otherwise you will need to first create a Corefactors Lead API so that Zapier can send data to it. To do this, first go to “Lead API Configuration” under configuration setting of Lead Box and select “Create API”.
Fill the necessary details like “API Name, and Fields”. You can map more fields by using the “Add Field” option.
You can also select default values for fields like “Lead Source, Default Stage, Lead Type, etc.”, if you want.
Please note there are two kinds of fields; Corefactors Fields and API Fields.
Corefactors fields are those fields that you configure or customize in Corefactors Lead Box (notice “Field Customization” option in the left hand side).
API fields are those fields that will be coming through API from 3rd party applications. E.g. Pabbly, Website Form, Facebook, Google Adwords etc. In this case, it is Zapier.
Please take care of wordings of your API field. It has to be exactly the same as what you will be sending through API.
Kindly refer to Step 5 last image “Label” names for better understanding. There it is “Message”, that is why we have written it as “Message” and have mapped it to the " Corefactors Lead Requirement” field.
OR “customer_name” as an example; in Corefactors Lead Box it is First Name whereas in Google Sheet it is “Name” that will be coming through API.
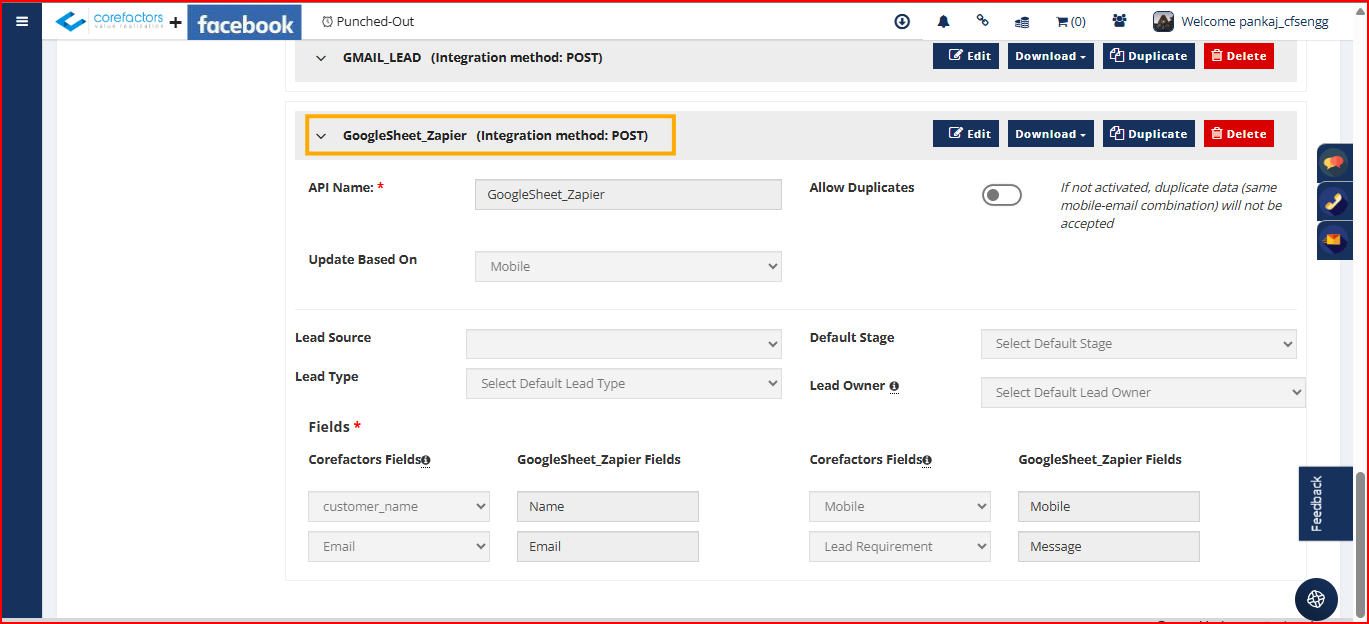
Once your Lead API is created, kindly download the “Single Lead Create/Update API document” and copy the URL for your reference.


Note: Kindly remove any extra space while copying the URL. You can check it by copy-pasting the URL in your notepad.
API URL for this testing: https://teleduce.corefactors.in/v1/lead/apiwebhook/GoogleSheet_Zapier/
Note: You will find “Corefactors API-KEY” details under the Admin User Profile menu.

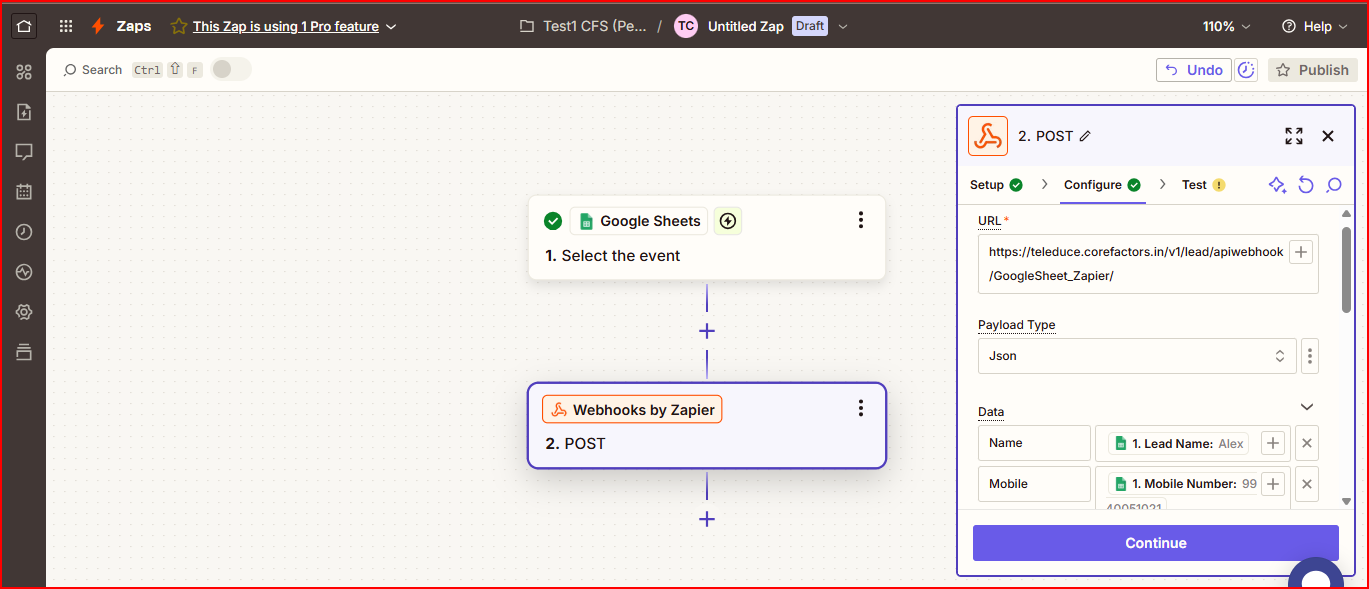
Now go back to the Zapier Zap creation process.
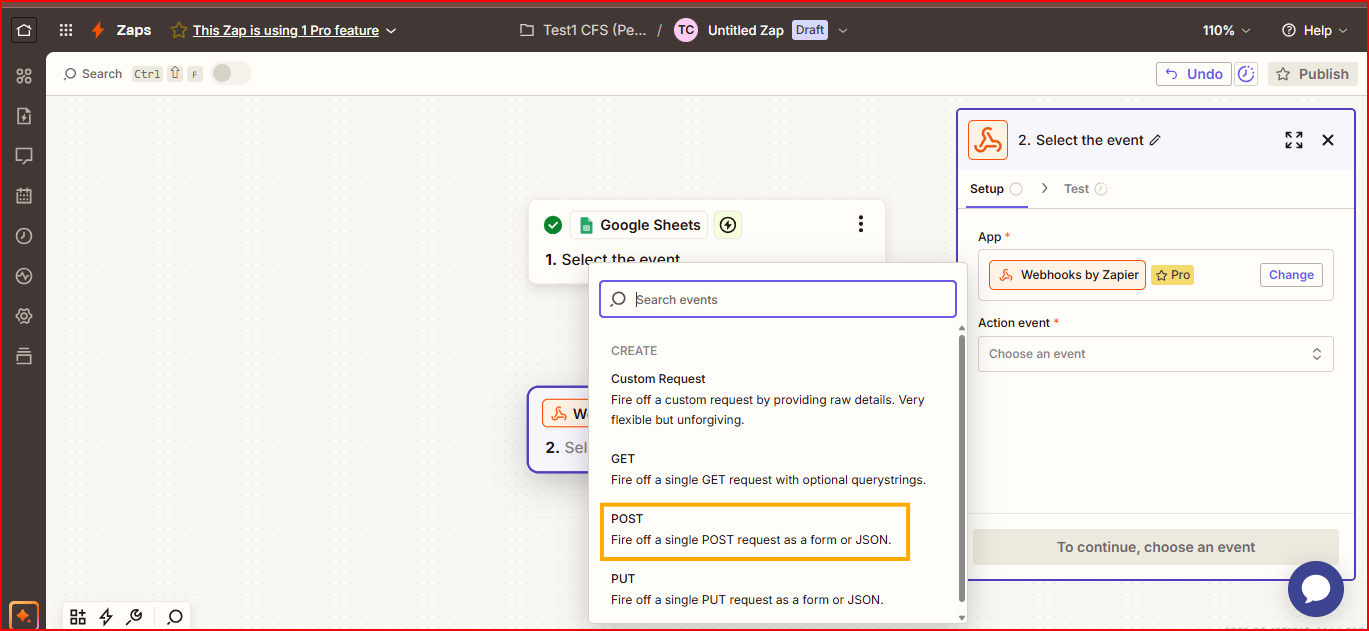
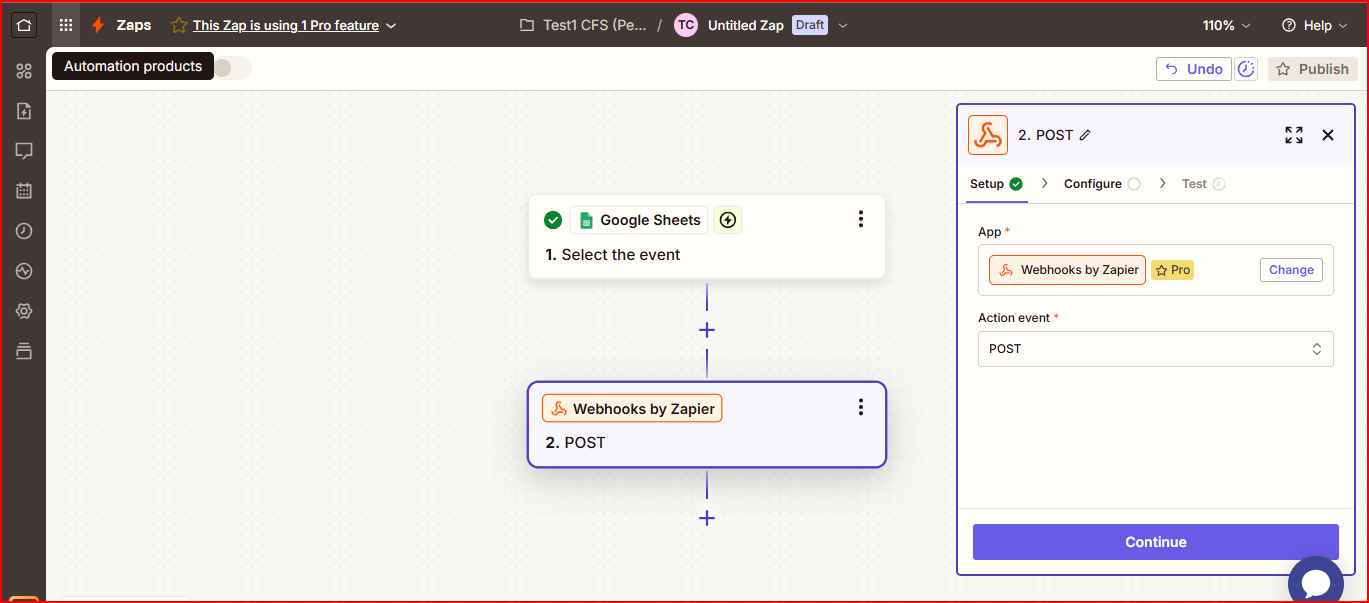
Select “Action Event = Post”.
API URL for this testing: https://teleduce.corefactors.in/v1/lead/apiwebhook/GoogleSheet_Zapier/
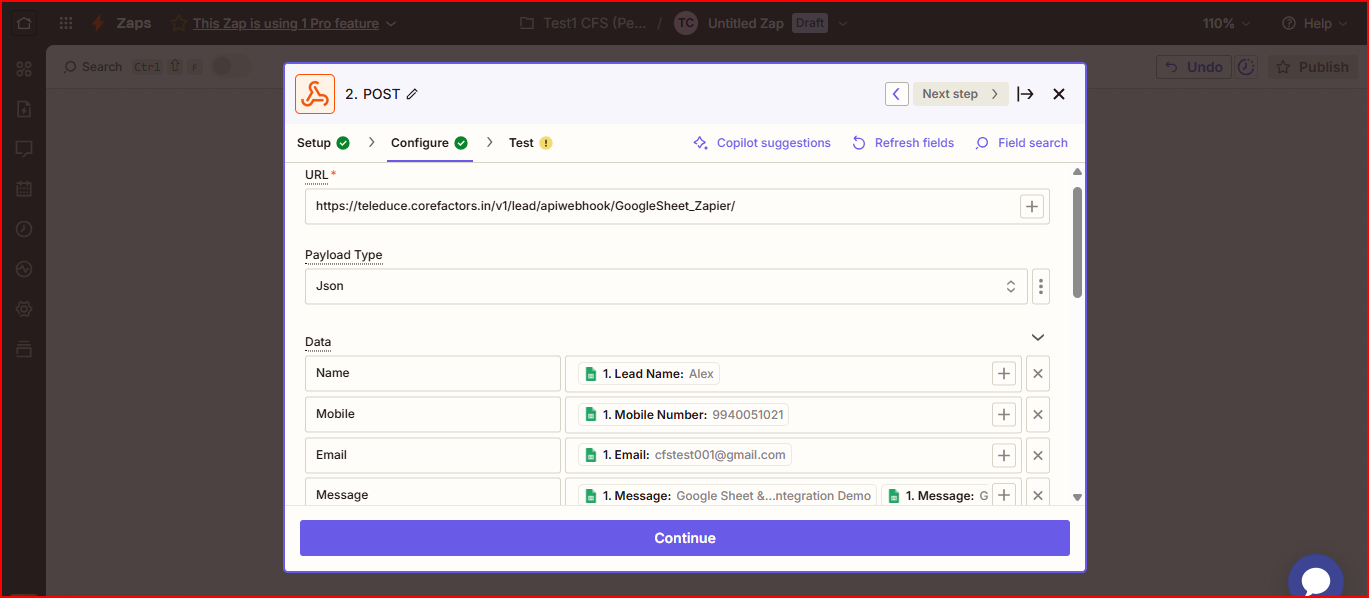
Select “Payload Type = JSON” and do the data mapping properly.
Do the proper data mapping here.
In the “Configure” step, keep Basic Auth as empty.
In Headers, enter “API-KEY” and its value.

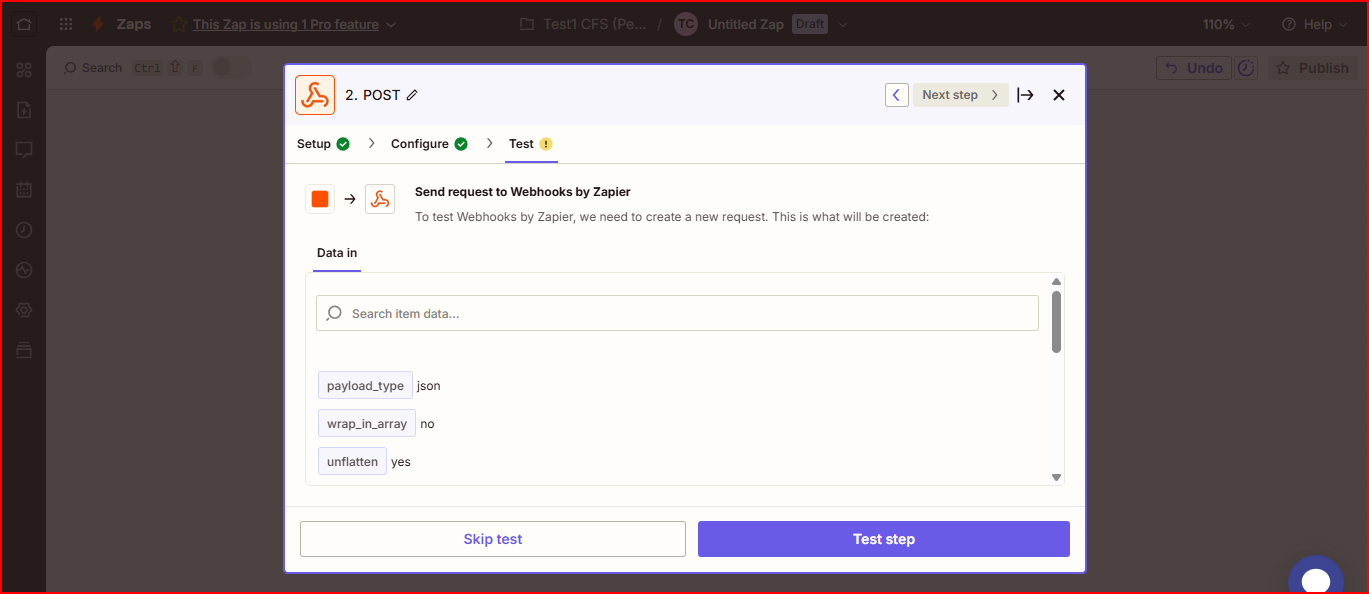
Now your configuration is ready and to test whether Zap is working fine or not, click “Test step”.
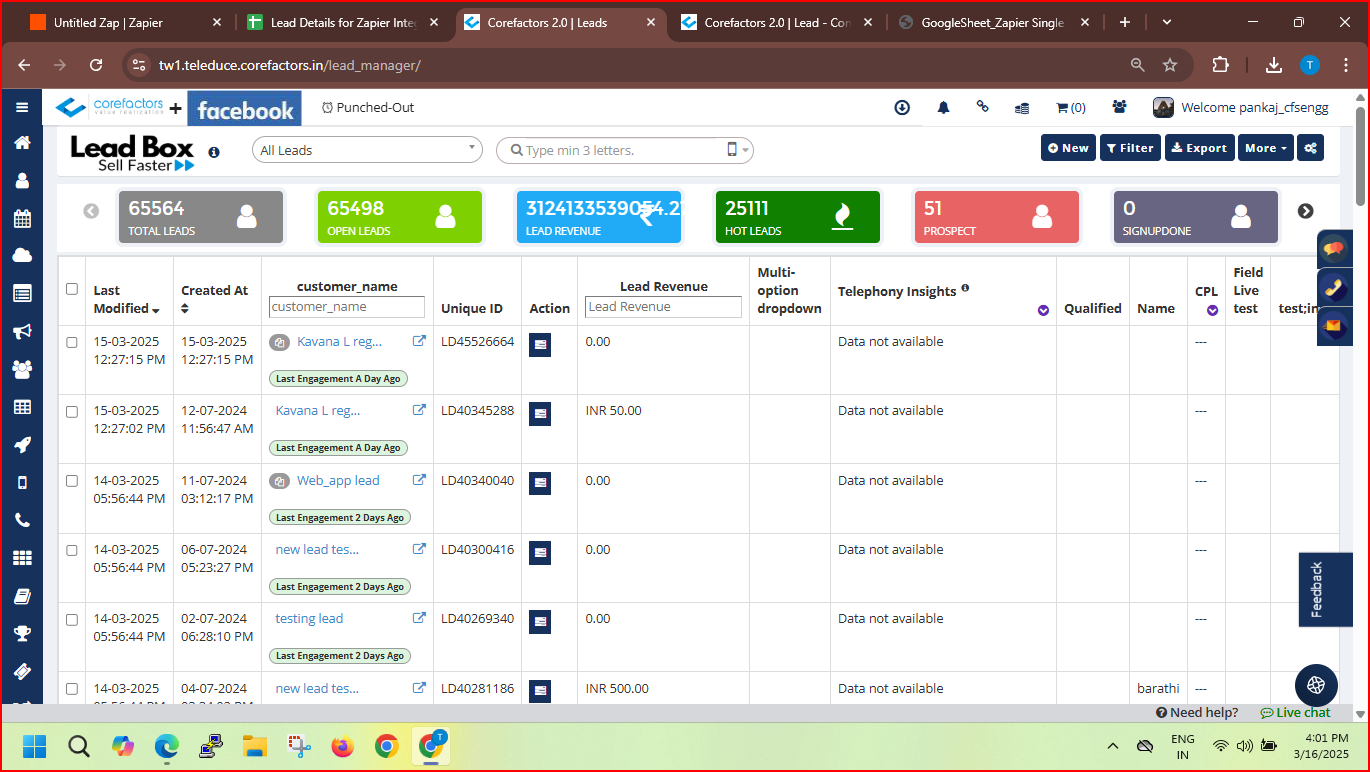
Before we clicked on the “Test step”, we wanted to show the current status of “Lead Box”. As you can see there, the last lead is “Kavana L reg” and “Alex” from Google Sheet is yet to be created there.
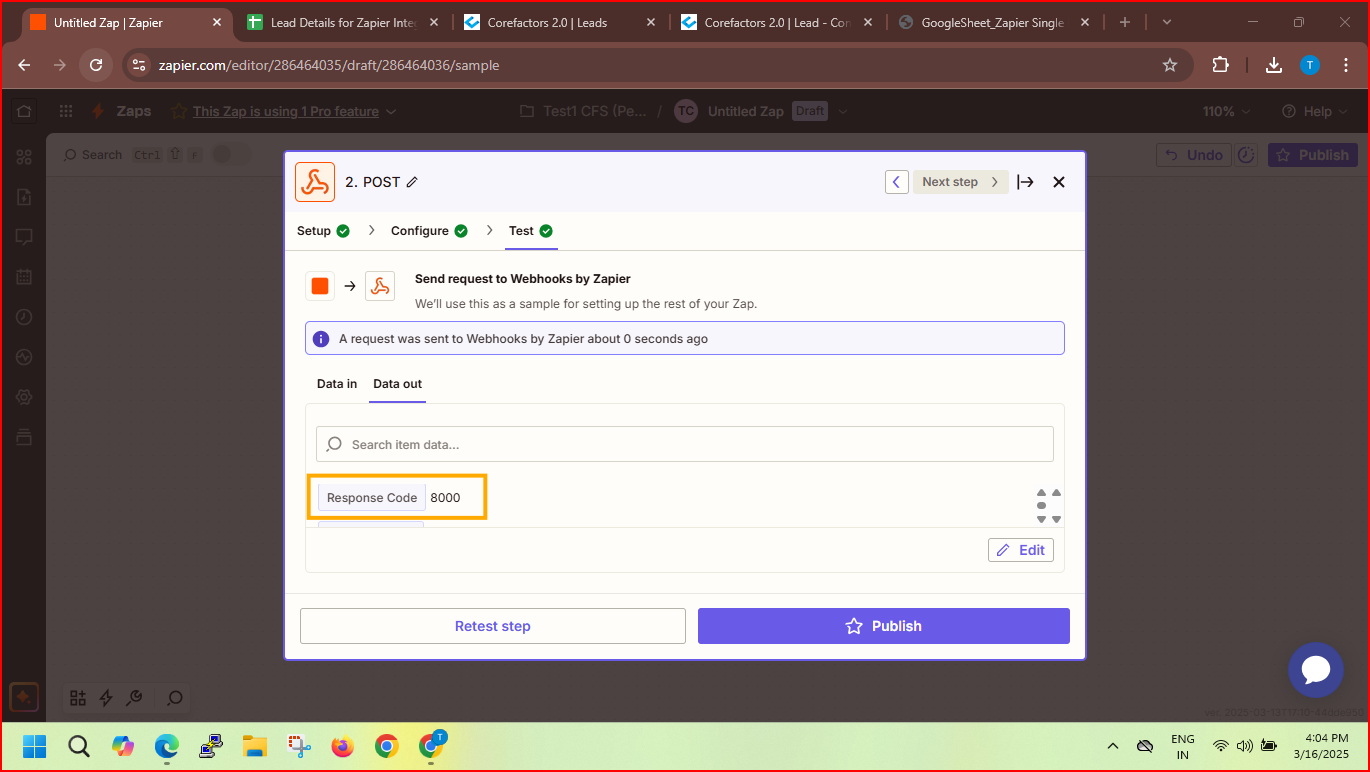
On clicking “Test step”, Zapier will send the Webhook request to Corefactors lead api end point url (as shown below).
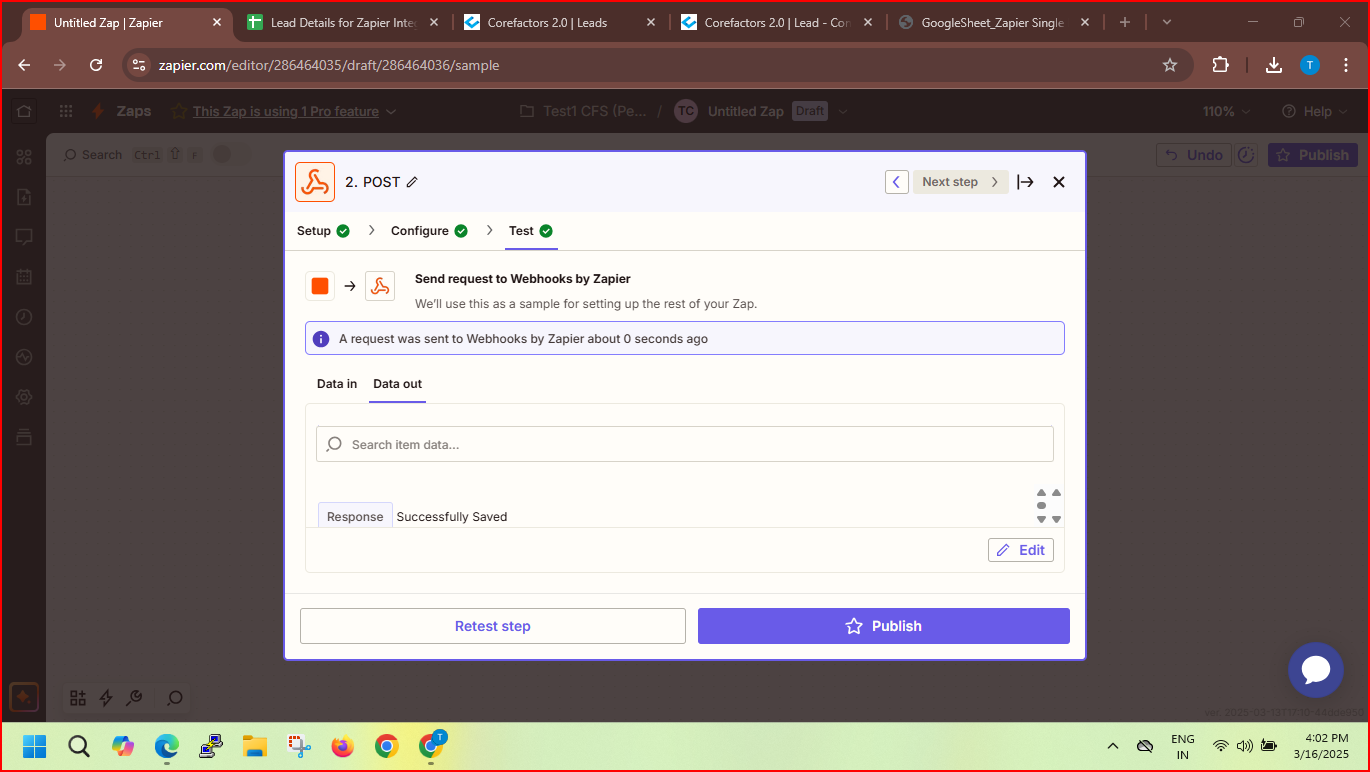
As you can see the “Response Type = Success”, it means lead data is successfully sent to Corefactors Lead API.


To check whether the lead data was truly received in your Corefactors Lead Box. Kindly go to “Corefactors > Lead Box > All Leads”.
As you can see here, the lead “Alex” is successfully captured here.

You can also check the lead activity by clicking on lead and going to the “ACTIVITY” tab for more details.

Now you can publish your Zapier.
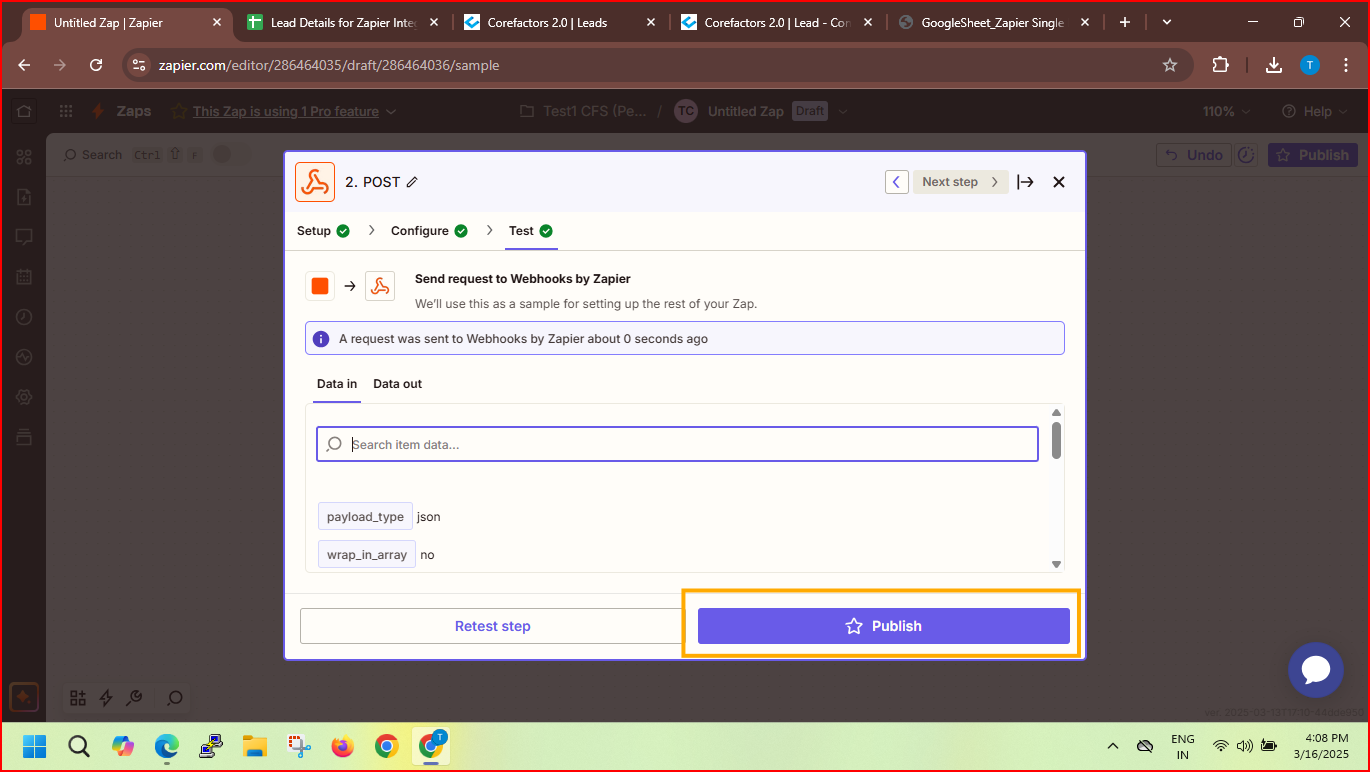
Note: Webhook feature in Zapier is available in “Zapier Professional” plan only.

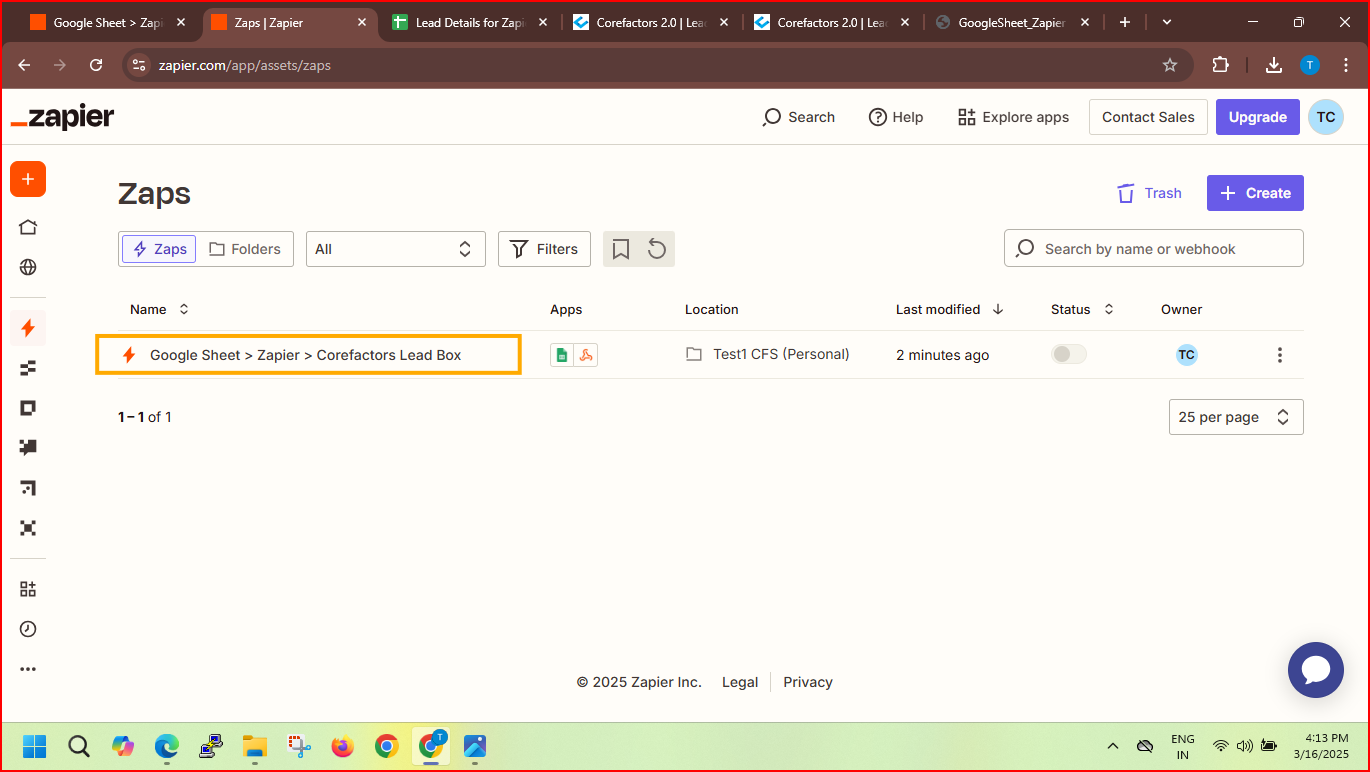
This completes the “Google Sheet and Zapier Integration setup” here.
Important Note: Corefactors Lead API accepts mobile number in E.164 format (E.g. +9199300*****) only. If you receive any error message like “Failed to read mobile number in payload”, kindly check your mobile number format.
Need help in Integrating Zapier?
Our team is here to ensure a seamless connection. Get started today!


.png)


.png)